
I have a real knack for finding problems that nobody else seems to have come across. Or if they did, they didn’t document it. Or if they did, well maybe I’m just rubbish at looking for the one article that would explain everything out to me. If anything it has trained me to get good at pulling information together to figure out these problems.
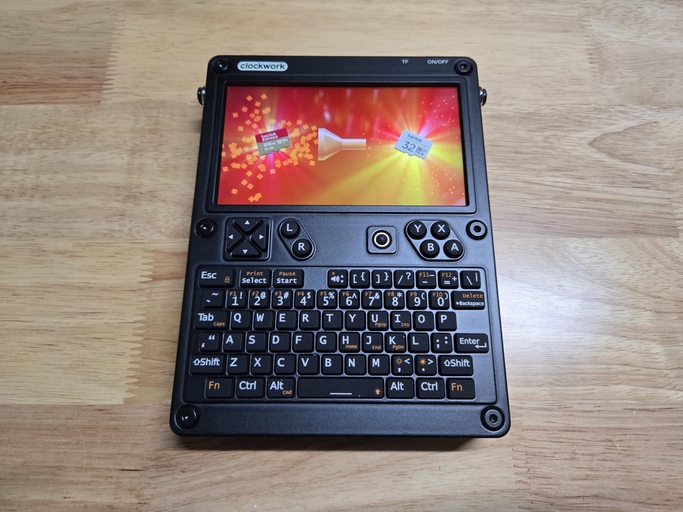
Case in point; I wanted to liberate a 256GB MicroSD card from my delightful uConsole. The only other MicroSD cards I had on hand were 32GBs, which I figured was sufficient for the uConsole, and I wanted the 256GB for my PlayStation Vita. Okay, easy. I’ll just shrink the partitions, back them up, and restore them.
Narrator:
It was not easy.
A Tight Squeeze
The uConsole, a Raspberry Pi based cyberdeck, uses MicroSD as its primary storage medium. The plan was to uplift the contents of that capacious card and squeeze them into a much smaller one. The amount of actual storage in use was well within the bounds of the destination card, so it should be possible in theory.
The BOOT partition was easy enough to back up at ~480MB, so I took an image of it as-is. For the partition occupying the rest of the disk (ROOT), I shrank it down to slightly smaller than 32GB minus the aforementioned 480MB to make sure they would both fit (I could always expand it later).
Easy enough to do with GParted. At this point, both partitions were individually backed up and sitting on my laptop.
Now, it would also have been possible to back up the entire disk and shrink it while in that state, but without enough space on my laptop I didn’t bother to pursue it any further.
Silent Running
The next step was of course to format one of the 32GB cards and create two partitions on it, the BOOT partition at 480MB and the ROOT partition occupying the remaining space. Both partitions were restored from the images taken earlier, and ready to go.
Plug the MicroSD into the uConsole, and… black screen. No output. Nothing.
Okay, so the uConsole has a weird screen that probably wasn’t getting drivers yet ‘cos it hadn’t got far enough through the boot process. But it does have an HDMI port, so I plugged in a monitor to see what was happening.
A black screen with a blinking cursor.
Great. Cool. Very informative, thanks. Yes, Raspberry Pi seems to want to hide a lot of the complexity which unfortunately means things can be a lot harder to diagnose. But not impossible! The answer I found here gave me a good suggestion for editing the cmdline.txt file in the BOOT partition. The key change was:
console=tty3console=tty1
And now on boot, I could see what was going on. It was waiting for a partition with a specific PARTUUID to present itself. Okay, it told me what PARTUUID it was looking for, so I checked the partitions on the old and new cards. Right enough, the old card had the expected PARTUUID for ROOT, the new one had something different.
So I figured I’ve got two options at this point. I can change all the references to the old PARTUUID on the new MicroSD card, or I can try and change the PARTUUID so it matches up as expected. I wasn’t certain I’d be able to easily find all the places to change it for the former, so I went with the latter.
A Case of Mistaken Identity
Now the PARTUUID is a generated ID as a shorthand combination of the disk identifier and the partition identifier. The partition identifier was the same as before, since it was a complete copy of the old one. The disk however, was totally new, and initialised in isolation from the backup procedure, so it had its own, new ID. But it can be changed! I found the solution here (with the msdos partition table) and am sharing it here for posterity.
For disks with GPT partition table:
You can change the PARTUUID of a partition with
gdisk. I’d recommend to readman gdiskfirst. In the following example I show how I changed the PARTUUID of the second partition on my first drive (sda):$ sudo gdisk /dev/sda [sudo] password for mook: GPT fdisk (gdisk) version 1.0.5 Partition table scan: MBR: protective BSD: not present APM: not present GPT: present Found valid GPT with protective MBR; using GPT. Command (? for help): x # enter x to change to experts menu Expert command (? for help): c # enter c to change PARTUUID Partition number (1-2): 2 # enter the number of the partition you want to change Enter the partition's new unique GUID ('R' to randomize): r New GUID is 76349364-D66C-4C19-B422-237A0D2DB9F5 Expert command (? for help): m # enter m to go back to main menu Command (? for help): w # enter w to write the change to disk Command (? for help): q # enter q to exit gdisk $For disks with msdos partition table:
For disks with msdos-partition-table
blkidproduces a PARTUUID based on theDisk Signature(Disk identifier) and the partition number (Source).Different disks must always have different identifiers. See the files in
/dev/disk/by-partuuidwhich are links to the devices (e.g./dev/sda1). Both of your disks/dev/sdband/dev/sdchave the same identifier which leads to the same PARTUUID for two different partitions. This would theoretically result in two links with the same name but different targets in/dev/disk/by-partuuidwhich is not possible at all. Probably this is the reason for your problems and you should definitely change one of the disk identifiers.Here an example how we can change the disk signature using
fdisk:First check the disk identifier with
fdisk -l:~$ sudo fdisk -l /dev/sdc [sudo] password for mook: Disk /dev/sdc: 7.25 GiB, 7776239616 bytes, 15187968 sectors Disk model: USB FLASH DRIVE Units: sectors of 1 * 512 = 512 bytes Sector size (logical/physical): 512 bytes / 512 bytes I/O size (minimum/optimal): 512 bytes / 512 bytes Disklabel type: dos Disk identifier: 0x60123f75 Device Boot Start End Sectors Size Id Type /dev/sdc1 2048 15187967 15185920 7.2G 83 LinuxNow change the disk identifier with
fdisk:~$ sudo fdisk /dev/sdc [sudo] password for mook: Welcome to fdisk (util-linux 2.34). Changes will remain in memory only, until you decide to write them. Be careful before using the write command. Command (m for help): x # enter x to go to expert menu Expert command (m for help): i # enter i to change identifier Enter the new disk identifier: 0x60123f76 Disk identifier changed from 0x60123f75 to 0x60123f76. Expert command (m for help): r # enter r to return to main menu Command (m for help): w # enter w to write change to MBR The partition table has been altered. Calling ioctl() to re-read partition table. Syncing disks.Now recheck with
fdisk -l:$ sudo fdisk -l /dev/sdc Disk /dev/sdc: 7.25 GiB, 7776239616 bytes, 15187968 sectors Disk model: USB FLASH DRIVE Units: sectors of 1 * 512 = 512 bytes Sector size (logical/physical): 512 bytes / 512 bytes I/O size (minimum/optimal): 512 bytes / 512 bytes Disklabel type: dos Disk identifier: 0x60123f76 Device Boot Start End Sectors Size Id Type /dev/sdc1 2048 15187967 15185920 7.2G 83 Linux
I basically ran through the process as is, using the identifier I wanted to use. Plugged everything back in, and voila, the uConsole was alive and kicking, despite its significantly diminished storage capacity. Happy days!
Careful With That MicroSD!
At some point during this whole process, I managed to miss the MicroSD slot while inserting one in. The gap in the case is slightly larger than the slot itself, so the card went into the guts of the uConsole. There was no easy way to get it out so I ended up disassembling the device, and this led to a whole bunch of new problems. The screen wouldn’t come on even with the original card (but I could (sometimes) SSH in), partial functionality, all sorts of odd behaviour. Basically I think in the process of disassembling I’d managed to slightly dislodge one of the boards from its seating, and possibly a cable, so it’s worth taking extra care to ensure everything is plugged in firmly on reassembly whether you meant to touch it or not.
Anyway, I got the MicroSD card back and with a lot of trial and error I did eventually get it working again, but not before I was about ready to give up!
Next time I will talk about backing up and refreshing the Vita, and how to use the MicroSD card with the SD2Vita adapter.
© Copyright 2025
Phil Watson
Last updated
Sunday, 16/Nov/2025 10:17 UTC